When you’re trying to boost subscribers on your eCommerce site, it makes sense to encourage customers to create an account. But there are also reasons you may want to enable guest checkout in WordPress.
Guest checkout is a feature offered by many eCommerce stores that allow customers to place orders without having to sign up for an account. Rather than their full contact and registration details, they can simply enter their email and credit card information. This makes the checkout much faster and easier and can help increase conversions.
In this step-by-step tutorial, we’ll show you how to enable guest checkout in WordPress using two plugins:
How to Enable eCommerce Guest Checkout with EDD
If you sell digital products, Easy Digital Downloads (EDD) is an invaluable plugin:

This powerful eCommerce solution lets you sell eBooks, downloads, software, and so much more with ease. You can handle all of your order and customer management directly from your WordPress dashboard. It also comes with impressive built-in functionality and extensions that help you customize, configure, and enhance your online store.
You can follow these steps to enable guest checkout with EDD:
Step 1: Install and Activate EDD
The first step is to add the EDD plugin to your site. If you don’t already have EDD installed and activated on your site, you can follow this guide.
We recommend purchasing a premium plan such as the EDD All Access Pass so that you have unlimited access to all our tools and features, including PayPal and Stripe add-ons that can help streamline the checkout experience.
Step 2: Configure the Checkout Settings
When EDD is active on your site, you can configure the checkout settings by going to Downloads » Settings » Payments » Checkout:
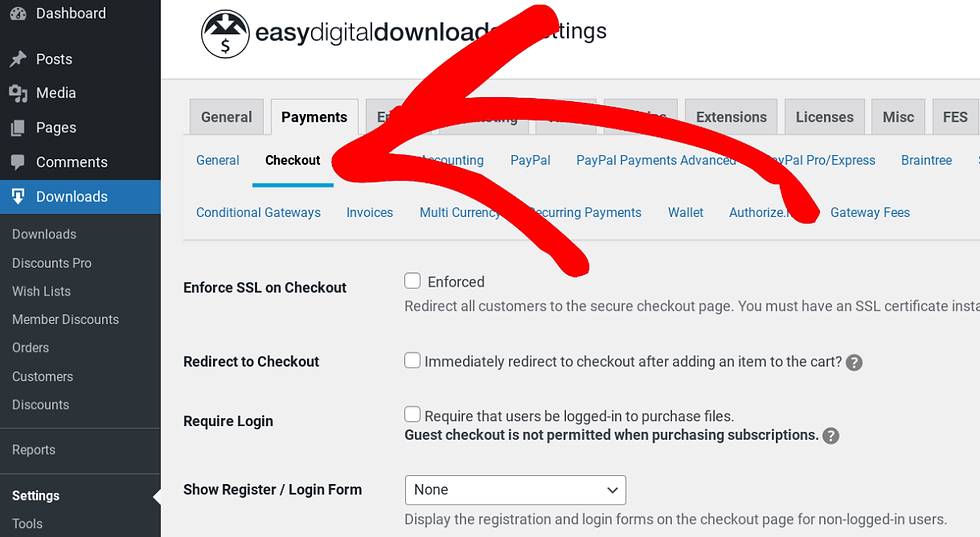
On this screen, check to make sure the Require Login option isn’t enabled:

If you select this checkbox, your visitors won’t be able to complete a purchase unless they log in first. So to enable guest checkout in WordPress, it’s important to make sure this is left off.
Next, scroll to the Show Register/Login Form option:

Here, you have the option to add a registration form and a login form to the checkout page. You can include only one, both, or neither. When it’s set to both, your checkout page will look like the following:
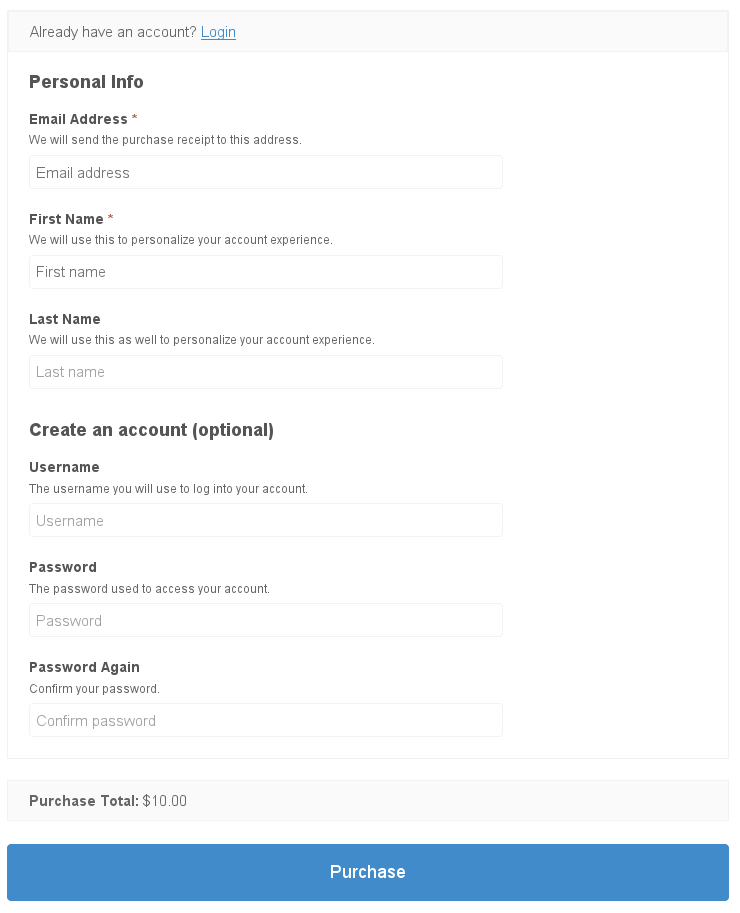
Notice that both the account creation and login forms are optional. You can also set this option to None so that the only information required is what’s needed to complete a purchase (email address for purchase receipts and payment information).
When you’re done, save your changes. Next, you can modify the checkout form fields to make them more concise. Navigate to Downloads » Checkout Form:

The Email Address field is required. Beyond that, any fields you want to include in the checkout form, such as First Name and Last Name, are optional. You can add them by dragging and dropping them from the Add Custom Fields panel on the right.
Step 3: Enable an Express Checkout Payment Gateway
When you enable guest checkout on your WordPress site, it’s also important to consider which payment gateway(s) you offer. The default payment method will affect both the appearance and experience of your checkout process.
Assuming you want to make it as simple as possible, you can eliminate the need for users to have to create or log into an account with a payment gateway provider. Some extensions you can use to do this include Stripe Express Checkout (which includes Apple and Google Pay) and PayPal Express.
To set these payment gateways up on your EDD site, you can follow these guides:
To select your payment gateway, navigate to Downloads » Settings » Payments, then browse to the Active Gateways section:
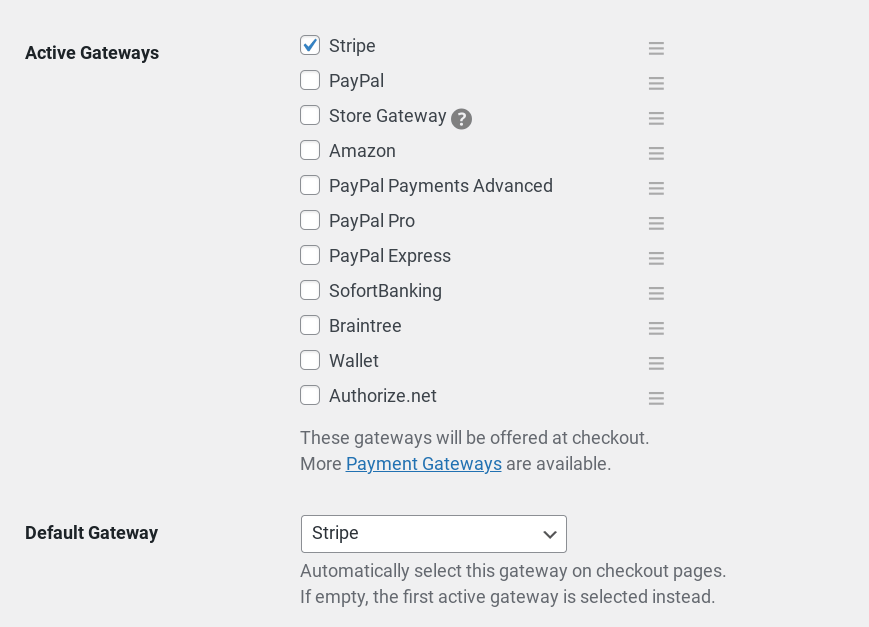
We’ll use Stripe as an example. Save your changes. Then go to Payments » Stripe:

Under Billing Address Display, select No address fields. Under Apple/Google Pay select Checkout:
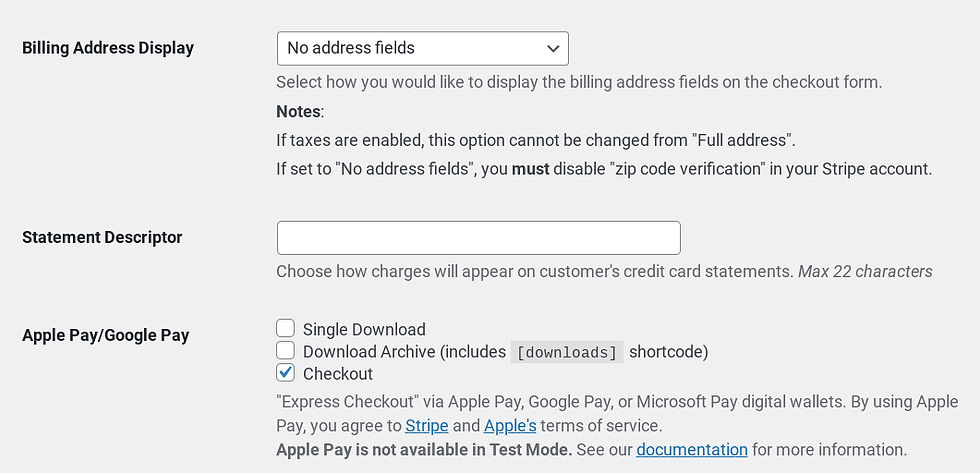
When you’re done, click on Save Changes. Now when your visitors go to checkout as guests, they’ll see something similar to this:

How to Enable Guest Checkout in WordPress with WP Simple Pay
WP Simple Pay is a plugin for WordPress that allows you to easily set up and manage an eCommerce checkout process. You can accept one-time or recurring payments without setting up a shopping cart on your WordPress website. This makes it a great option if you want to sell one product but don’t need to create an entire online shop.
Similar to EDD, you can use it to create customizable checkout pages, accept payments from a variety of different payment methods, and add security features to protect customer data. You can also use it to enable guest checkouts by following these steps:
Step 1: Download and Install WP Simple Pay
To get started, visit the website and select your plan. After registering, click on Downloads from your dashboard, then select Download » WP Simple Pay:
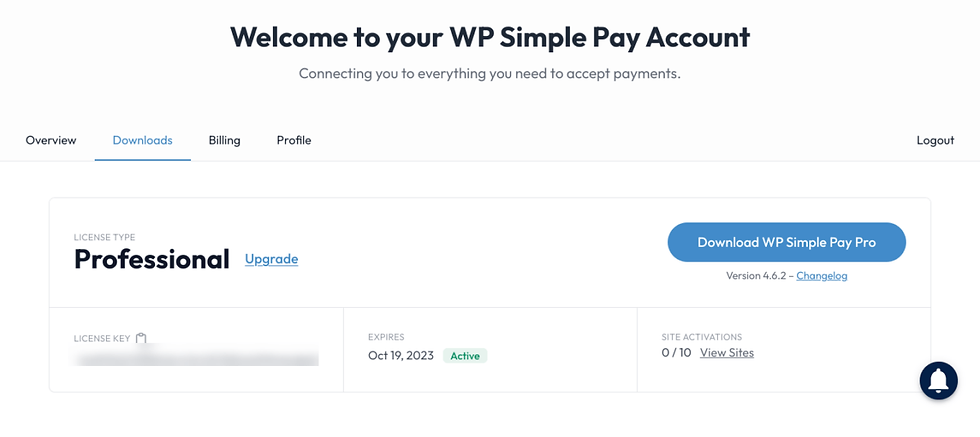
After you upload and activate the plugin, it will automatically begin the setup wizard:
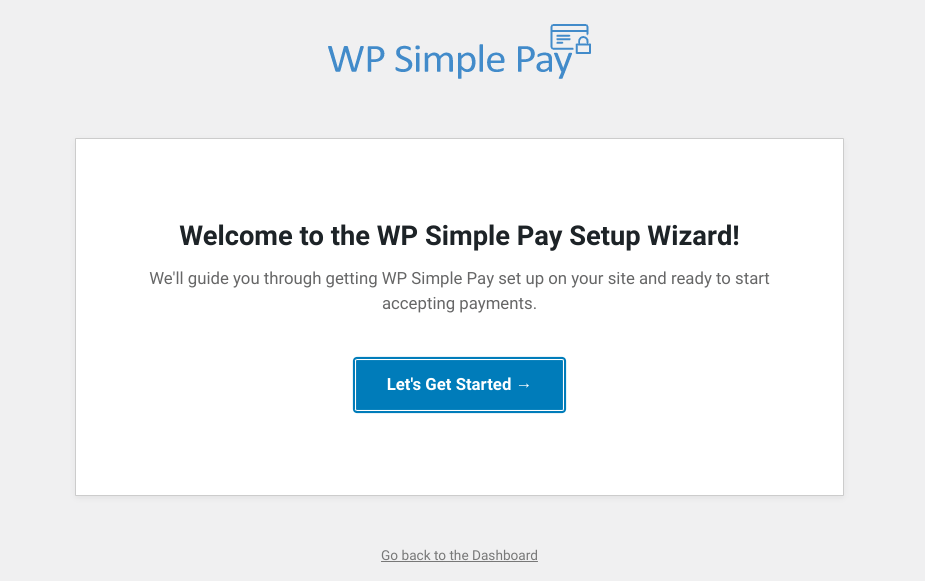
Click on Let’s get started. Next, you’ll need to enter your license key:
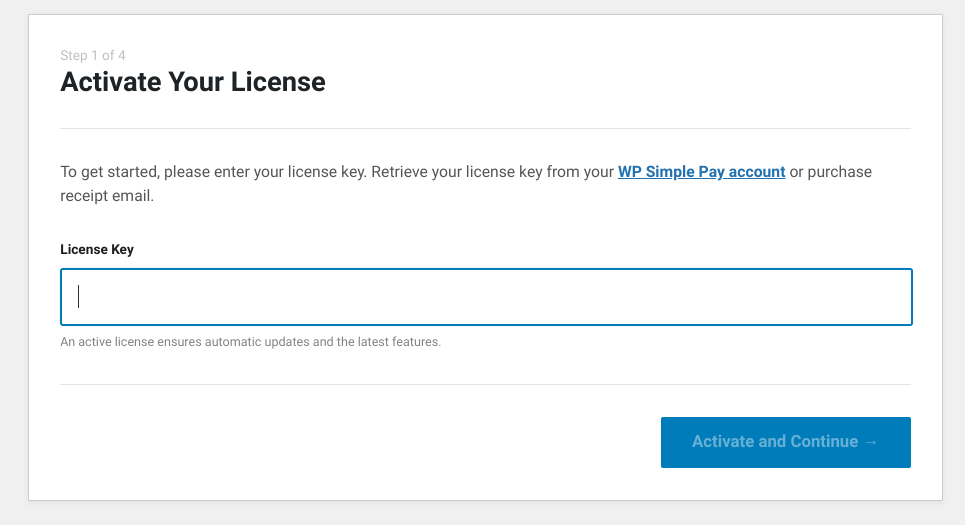
This will be located on your account page under Downloads. After you copy and paste it into the field, select Activate and Continue. Next, you’ll be prompted to Connect with Stripe:

On the third screen, it will let you configure your emails:
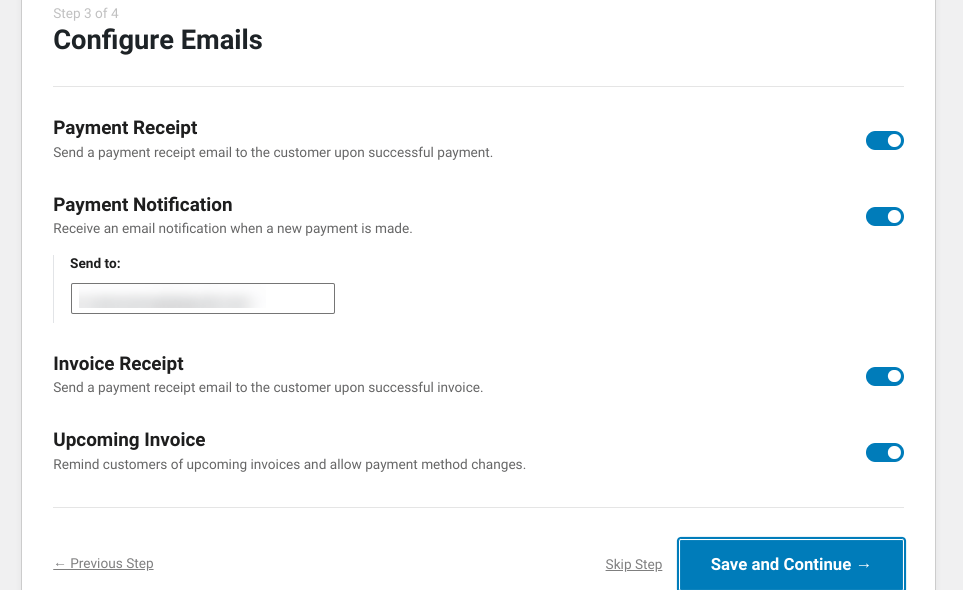
You can leave the settings as is or turn off any you don’t want to enable for your store. Select Save and Continue.
Step 2: Create a Guest Checkout Payment Form
When the setup is complete, you can click on Create a Payment Form:
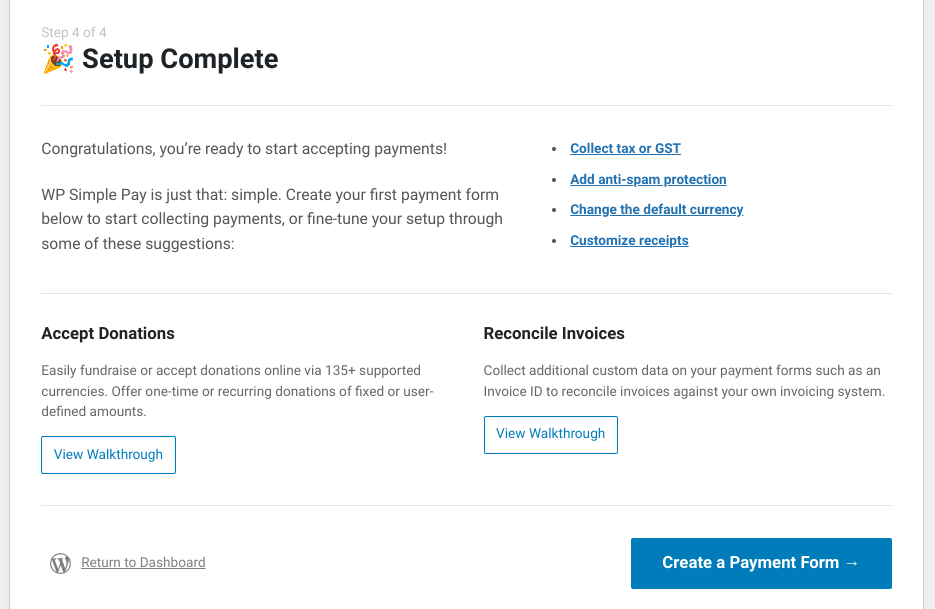
You can choose from dozens of premade templates depending on the type of site you have and the form you want to show users:

To keep it simple, we’ll select the basic form option. On the next screen, you can name your payment form and add a description:
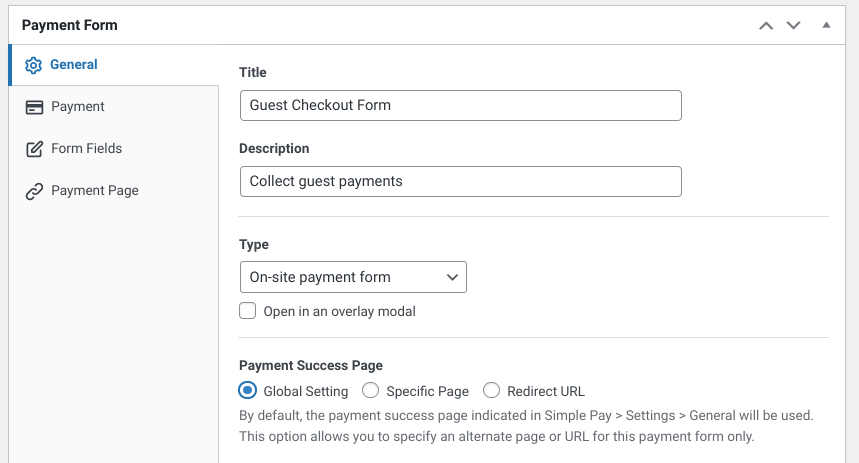
You can also select a Type and add the form to your Global Setting, a Specific Page, or a Redirect URL. Next, you can click on the Form Fields tab to change what information the customer must enter:
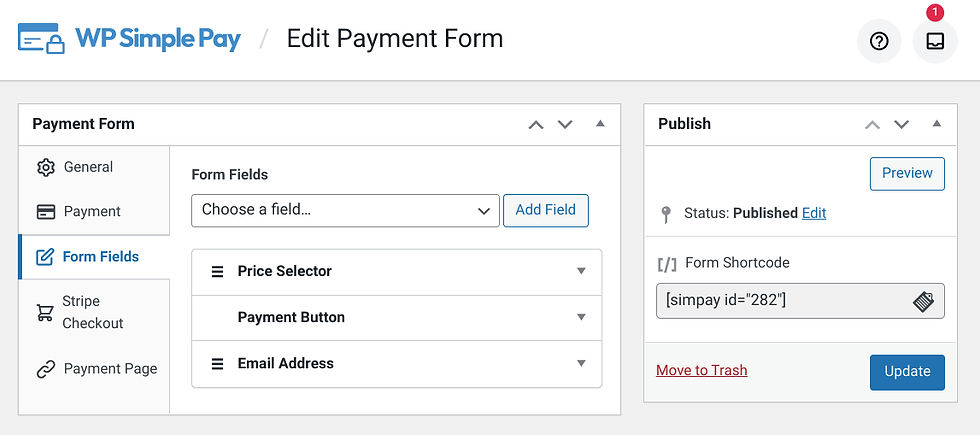
You can use the Payment Button panel to modify the text on the Purchase button. When you’re done, select Update/Publish.
Step 3: Add the Form to Your Checkout Page
If you plan to add a button or link somewhere on your cart page or website that lets users complete their checkouts as guests, you may want to create a separate checkout page. From your WordPress dashboard, go to Pages » Add New. Name it Guest Checkout:
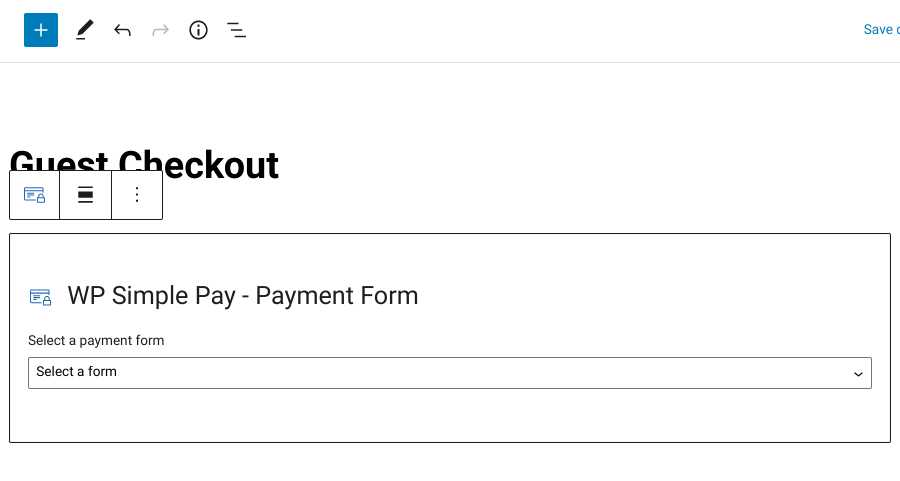
Insert the WP Simple Pay block. From the drop-down menu, select the guest checkout form we just created:
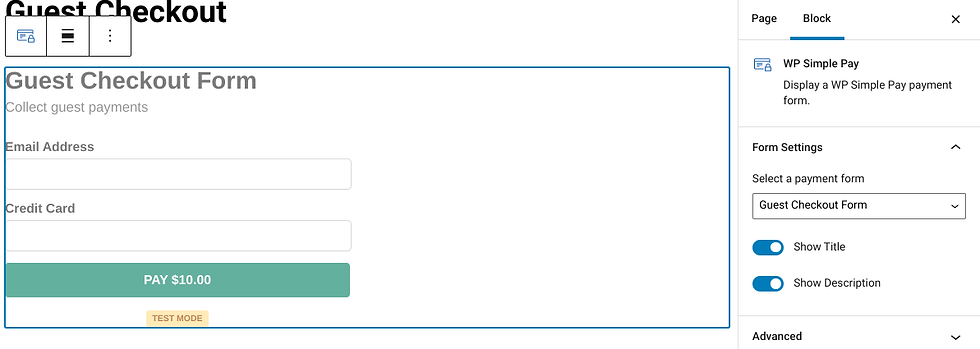
When you’re done, you can save and publish your changes. You can use this form anywhere you want to add the guest checkout option on your site. In addition to the block, you can also insert it using the shortcode that is listed on the right-side of the payment form builder.
Enable Guest Checkout to Increase Sales
Allowing your customers to checkout without creating an account on your website can help increase sales. It can make for a faster, smoother checkout process and reduce shopping cart abandonment.
Download Easy Digital Downloads today to add guest checkout functionality to your online store. You can also read How to Add a Buy Now Button to further improve your eCommerce user experience!
Be sure to subscribe to our newsletter and follow us on Facebook or Twitter for more WordPress resources!